Step 1: Import a Grid from the Template Library
Follow this guide to learn how.
Step 2: Check Imported Grid Source
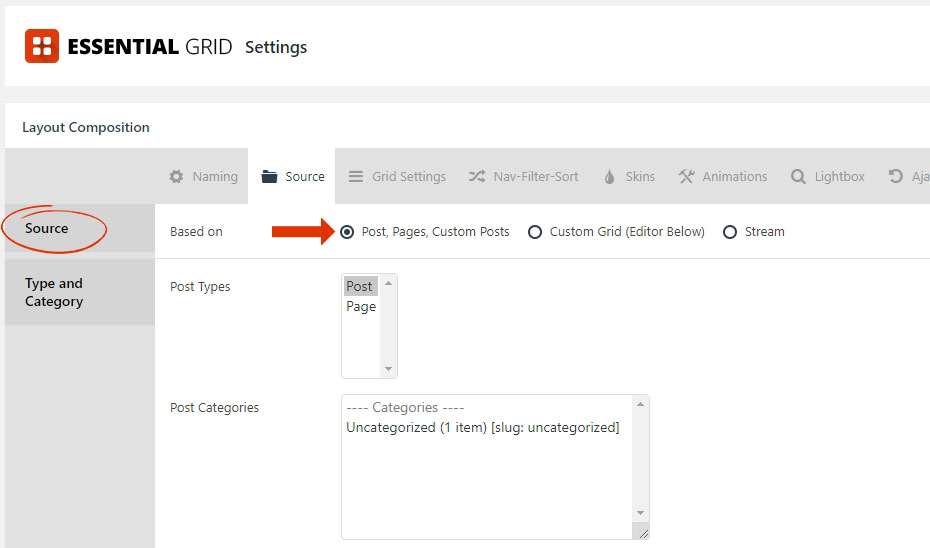
After importing the template, head over to the Imported Grid’s source to learn what type of content the grid is based on as shown below.

However, if the grid’s source is set to ‘Post, Pages, Custom Post‘, head over to the plugin’s Global Settings page following the instructions below to activate and import the plugin’s Ess. Grid Posts, which will populate the grid’s content with things such as Featured Images, Custom Meta Data, and additional post settings.
Important Note: Follow the steps below correctly so that the demo contents can be imported correctly.
Step 3: Enabling Example Custom Post Type
Switch “On” the Example Custom Post Type Option.
This option enables the Ess. Grid Example Custom Post Type.

Click “Save Settings”
To confirm the changes in the Global Settings.

Refresh the Page.
To complete the action.

Step 4: Importing Demo Contents
Click on “Import Full Demo Data” button to import all required demo contents.

Step 5: Apply Demo Contents to the Grid
Adjust the Post Source to Ess. Grid Posts and select categories to enable Post-Based Grid Filters as shown in the screenshot below.

Step 6: Editing the Grid Contents
Featured Images from the Demo contents can be edited directly by clicking on the “Edit Post” icon shown below.

Some demo contents display Custom Meta Data images from the grid “Post Meta” as shown below.


