Part 1:
Important Note: If the webfont is already being loaded by your theme, skip to Part 2 below.
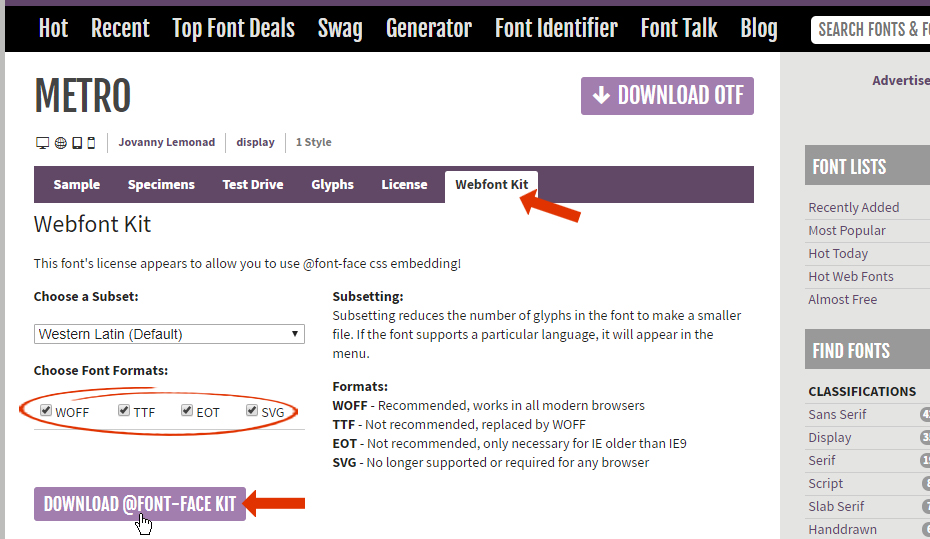
For the purposes of this article, we’ll use METRO from fontsquirrel
Click on the “Webfont Kit” tab, and select all Font formats. Then click the “Download @font-face kit” button.

Next, unzip the downloaded file, and then open the html file named “How_to_use_web_fonts.html”, and review the information in this document.

Next, click the download’s “webfont” folder, and then click on the “metro_regular_macroman” folder. Inside this folder, you’ll see the following font files:

Next, using an FTP program, upload the fonts to your website. For this example, we’ll create a new directory called “webfonts” inside the “wp-content” directory. So the fonts would be uploaded via FTP here:
wp-content/webfonts/


Next, open the “stylesheet.css” file in a text editor:

Modify the URLs to be absolute, so they’re loaded from the “wp-content/webfonts/” directory. Here’s an example:
@font-face {
    font-family: 'metroregular';
    src: url('http://www.mywebsite.com/wp-content/webfonts/Metro-webfont.eot');
    src: url('http://www.mywebsite.com/wp-content/webfonts/Metro-webfont.eot?#iefix') format('embedded-opentype'),
         url('http://www.mywebsite.com/wp-content/webfonts/Metro-webfont.woff') format('woff'),
         url('http://www.mywebsite.com/wp-content/webfonts/Metro-webfont.ttf') format('truetype'),
         url('http://www.mywebsite.com/wp-content/webfonts/Metro-webfont.svg#metroregular') format('svg');
    font-weight: normal;
    font-style: normal;

}
Next, copy the CSS above to your computer’s clipboard, and paste it into your Parent/Child Theme’s “style.css” file.
Part 2:
Edit your Grid Skin.

Select a Layer and manually type the “Font Family” name into the “Style” section of the Layer.
Important Note: Adding custom fonts this way will not show up in the Item Grid Skin. However, as long as the steps above were followed correctly, the font will show up when you view the grid from the front-end of your site.


